

|
Product Details:
|
|
| Brand Name: | Biosound Biosound |
|---|---|
| Model Number: | CA123 |
|
Payment & Shipping Terms:
|
|
| Packaging Details: | Neutral Package |
| Delivery Time: | 2-5 work days |
| Payment Terms: | T/T, Western Union |
|
Detail Information |
|||
| Category: | Medical Supplies | Service: | Outright Sale |
|---|---|---|---|
| Warranty: | 90 Days | Purpose: | Apply In Hospital |
| Conidition: | Compatible | Descriptionchinese Ultrasound Machine: | Needle Guides |
| High Light: | Medical Ultrasound Biopsy Needle Guide,CA123 Transducer Ultrasound Biopsy Needle Guide |
||
Product Description
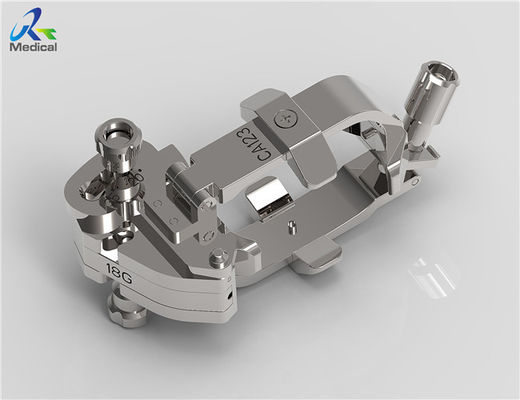
Ultrasound Biopsy Needle Guides for Biosound CA123 Transducer
1. Type:Two angles, accepts 16,18G Gauge instruments
2. Fits:Biosound CA123
3. Features:stainless steel, reusable, easy to clean and sterilize
4. Professional new one from Chinese factory, precision manufacturing
5. Qualified one in excellent working condition
6. Provide 90 days warranty
![]()
Other needle guides for Biosound system that we can offer:
| Brand | Model | Angle | Applicative needle |
| Biosound | CA123 | two angles | 16,18G |
| Biosound | CA421,CA430,CA431 | two angles | 16,18G |
| Biosound | EC123,EC1123 | single angle | 16,17,18G |
| Biosound | LA332 | three angles | 16,18G |
| Biosound | LA522,LA523,LA532 | three angles | 16,18G |
| Biosound | PA230E | 45-90° | 16,17,18G |
| Biosound | TRT33 | single angle | 14,16,18,20G |
| Biosound | CA541 | three angles | 14-22G |
| Biosound | CA631 | two angles | 16,18G |
| Biosound | PA240 | 25-65° | 16,17,18G |
Knowledge point
What is Ultrasound Biopsy Needle Guides
An ultrasound-guided biopsy is typically performed under general anesthesia. Ultrasound is used to locate the abnormality and a biopsy needle guide is used to pinpoint and guide the needle to the exact location. The tissue that is collected in the ultrasound guided needle biopsy is then examined by a pathologist.
a) Remove the needle guide from the transducer after each use. Use a small, soft brush to remove visible contaminants from the surface. Keep parts from drying out until complete cleaning can be accomplished.
b) Soak the needle guide for at least five minutes in a neutral pH, low foaming enzymatic detergent. While immersed, use instrument brush to remove trapped contaminants from surfaces and features. If visible contaminants are not easy to remove, repeat the soaking procedure for another five minutes. Remove the needle guide from cleaning solution and remove any remaining residue with dry wipe. Observe cleaning solution manufacturer’s directions for use and recommendations for concentration.
Enter Your Message
| Guangzhou Rongtao Medical Tech LTD. |
| Room 1705,Office Building B1,Wanda Plaza,No.2707,Kaichuang Road,Guangzhou,Guangdong,China |
| miley@ultrasound-service.com |

